Notion. Creating handy notes for any purpose
- KLAVA

- Nov 30, 2021
- 3 min read
Updated: Jul 18, 2023
Despite hearing about this application for a long time, I was not persistent enough to sit down and deal with it. It all seemed confusing and incomprehensible to me...
In spite of this, I decided to study this service a few days ago.
I've been using Notion for more than a year already, probably... Just for work and at the most basic level. For me, it was convenient to work with the team and to have a convenient table for viewing cases and their readiness. However, it was just someone's template, which did not fit my purposes or notes at all. That's why I made my own.
The idea is that I will add all the subheadings to this page: goals, work, training, travel, etc. This will be the main page.
Click the "New page" button in the lower-left corner to get started

You are then taken to a blank new page. This is the beginning of designing our homepage.

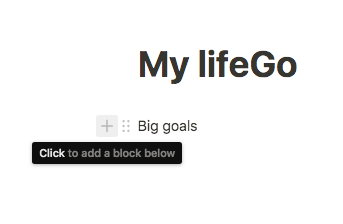
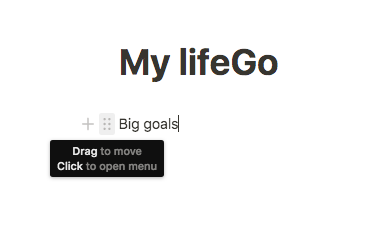
Type the name at the top. Add an icon (it will glow next to the page in your browser window and in the sidebar). You can use emojis or your own photo. A cover you added will delight you every time you see it. Once the design is complete, we proceed to structuring the blocks on our page. The first thing I do is list my goals and plans for the year. Each line begins with two buttons: + and :: + is used to add material or create a database (I suggest you familiarize yourself with each of them). :: drags the block to the desired position. Write the block's name, Objectives, in the text box. Click the plus button and choose "Page". We add our plans for the upcoming year to the page.


Fill out the page of the year

On this page, you will find a list of big goals for the year. In it, I created a base with three columns: the first will write a small goal for achieving a larger one, the second - the number of the larger goal, and the last - how it will assist me in achieving it.
The second block had a glider. In it, I created a list of things to do for the day and an event calendar. Here, I've added a to-do for every month, so you can see all the plans for the year at once.


With a beautiful photo and a favorite phrase, I finished the line.

Based on the same principle, I built the next blocks. Based on your convenience, you can build the system using a table, base, or list.
My next block will be about travel.
There, I set out the planning status, a rough date, and a list of possible locations. There will be a separate page created from the first pillar, which contains detailed information on the country and travel.

I began my travel topic with a list of all the countries I would like to visit.
Select "Toggle List" in the plus sign in order to hide all of the countries behind the arrow (not taking up much space).
Next, we will create the database.
We add cities and countries to the first column, but you can experiment with the other two.


The last item in my notebook is Money.
At this point, I made a link to the google document, as I maintain my personal budget there.
My next post will probably be about the personal budget.
The menu on the left will display all pages created within this project, which will speed up the transition to the desired block.

Notion was not nearly as difficult as it seemed at first glance. I liked the fact that you could create further bases inside each base. Additionally, it is convenient to include links to pages that already exist in the records.
Using Notion for teamwork or training is a great idea.
In this post, I've just briefly described how to get started building a page. By clicking the button in the upper right corner "Duplicate," you can also use my example.

Notion can be used both on a computer and on a phone.


I hope this article helped you. Please share with your friends if it was useful.
Written by Alina Starostina


Comments